Part 5: Programming the Processing System
Create an Application Project and a Board Support Package
When selecting Launch SDK from the Export Hardware for SDK dialog for the first time, Xilinx SDK will open up and present us a project consisting of nothing but the hardware platform specification.
You will find any useful information about memory addresses and components here. Note also the existence of the bitstream file, system.bit. If it does not appear here, go back to PlanAhead an step redo the export step. (You might have to open the implementation result manually in PlanAhead before being able to doing so.)
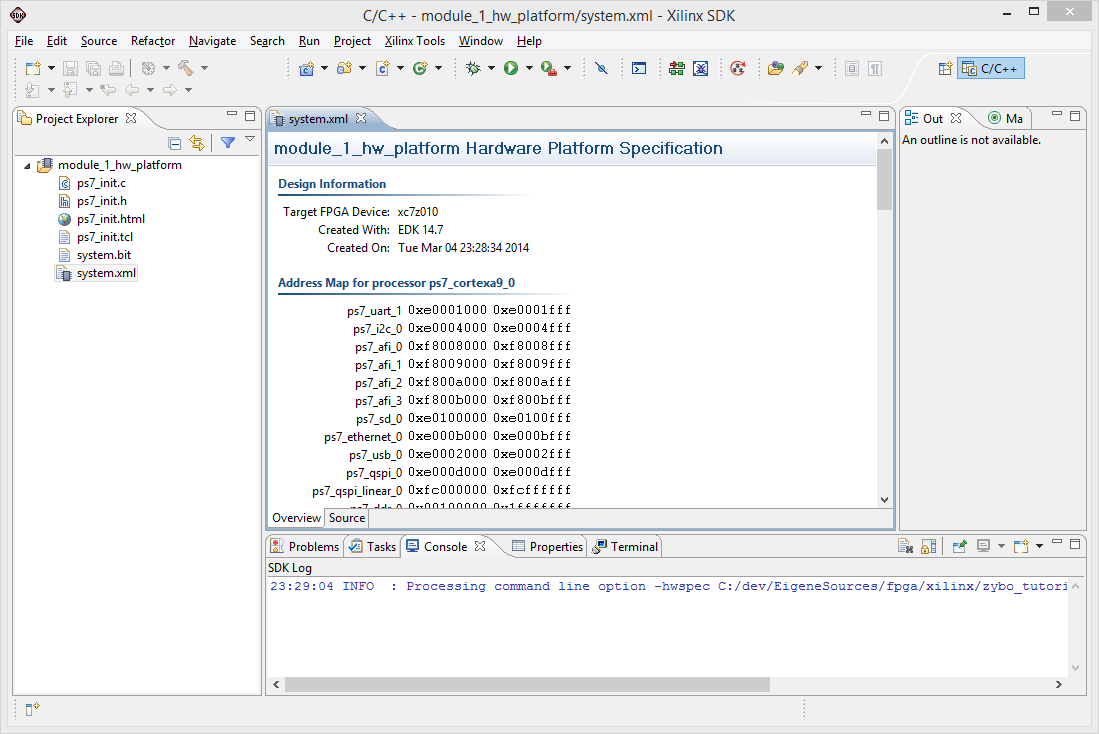
Select File, New, Application Project to create a new project. When asked for a template, select Hello World. This option does not always seem to appear, though.
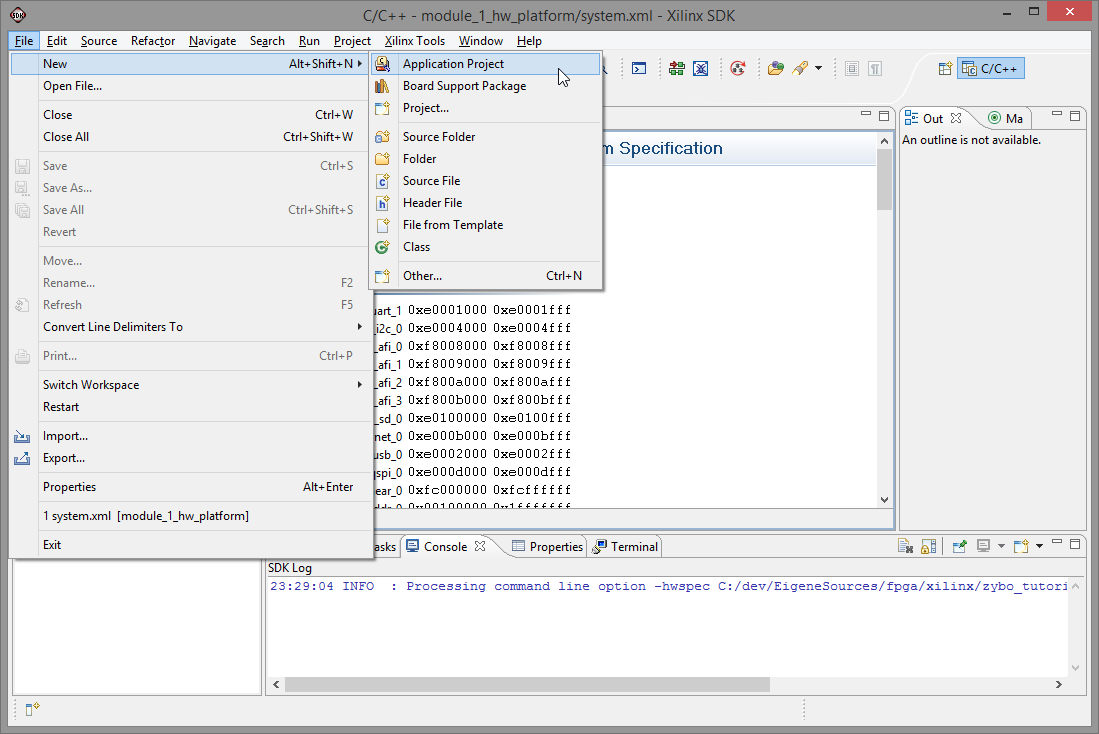
Give the project a name, select the just exported hardware platform and chose to Create a new Board Support Package, then click Finish.
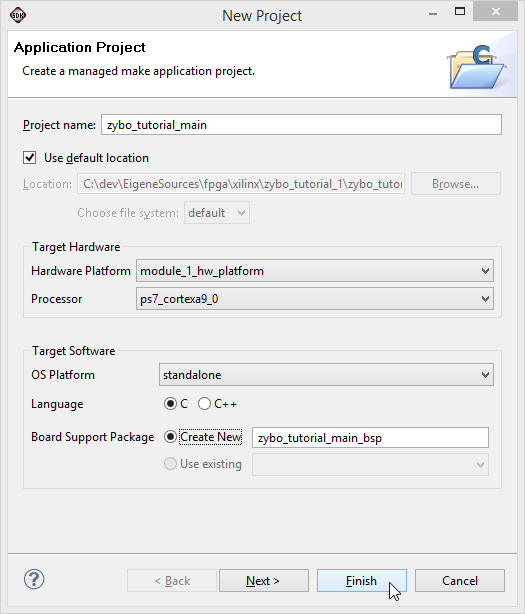
After that, wait for the build of the BSP to finish.
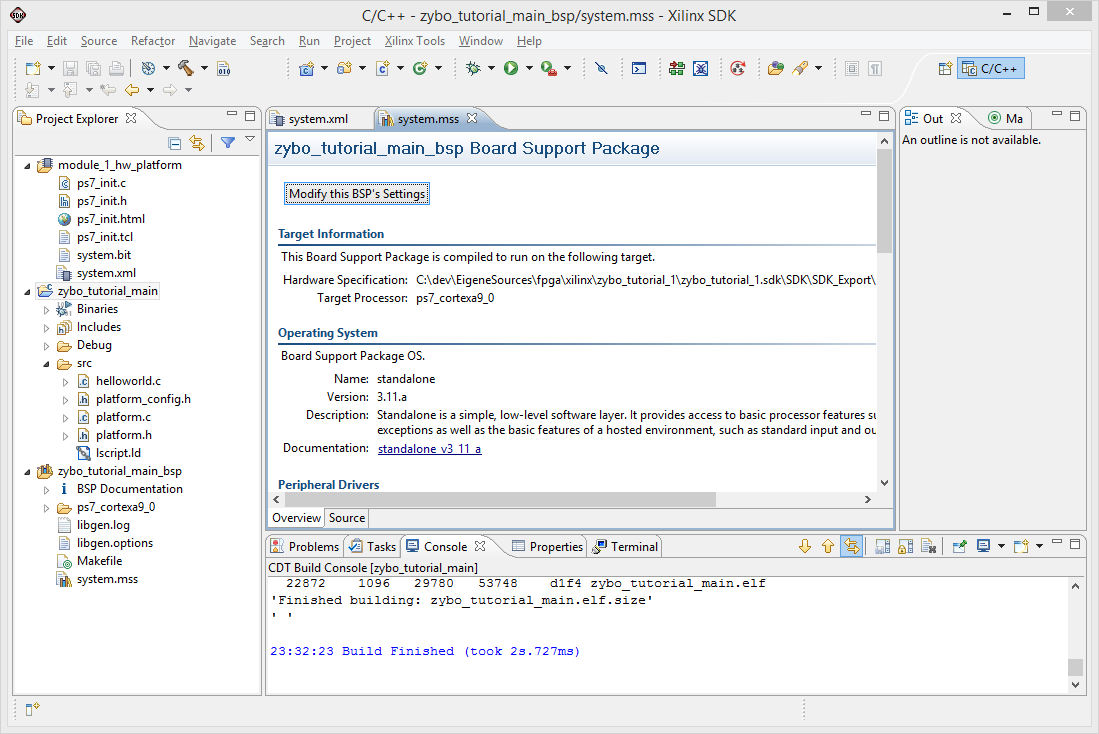
Switch over to helloworld.c and enter while(1) {} just before the return statement to prevent the processor from halting.
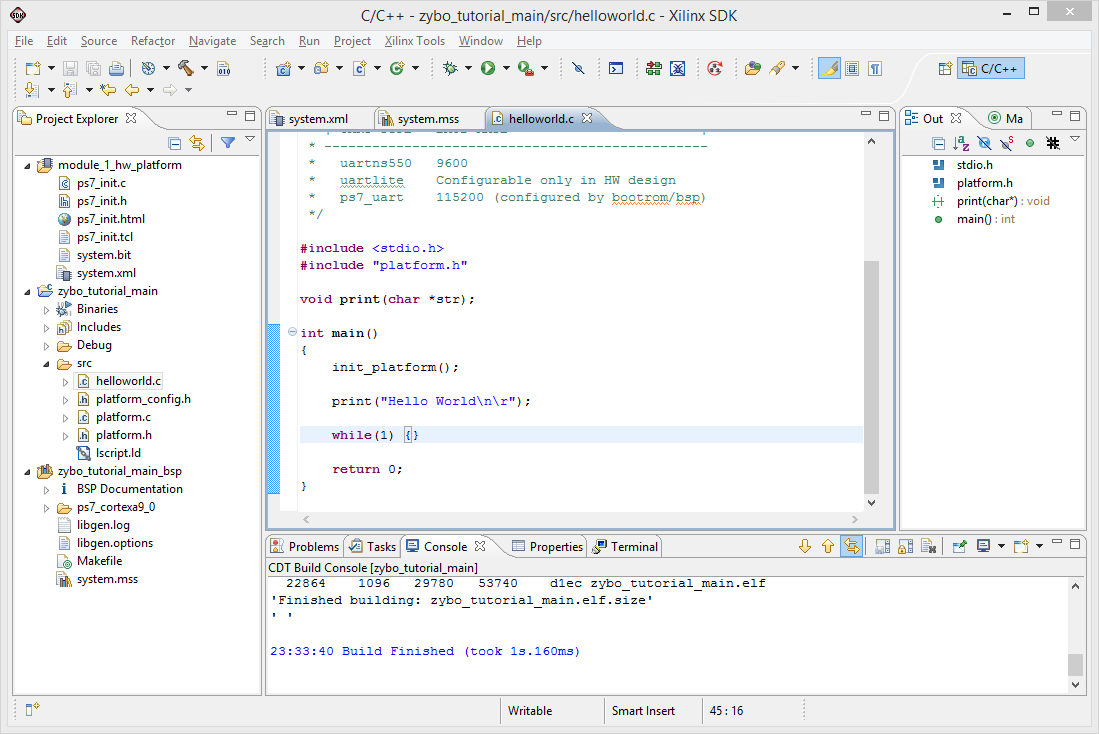
Program FPGA
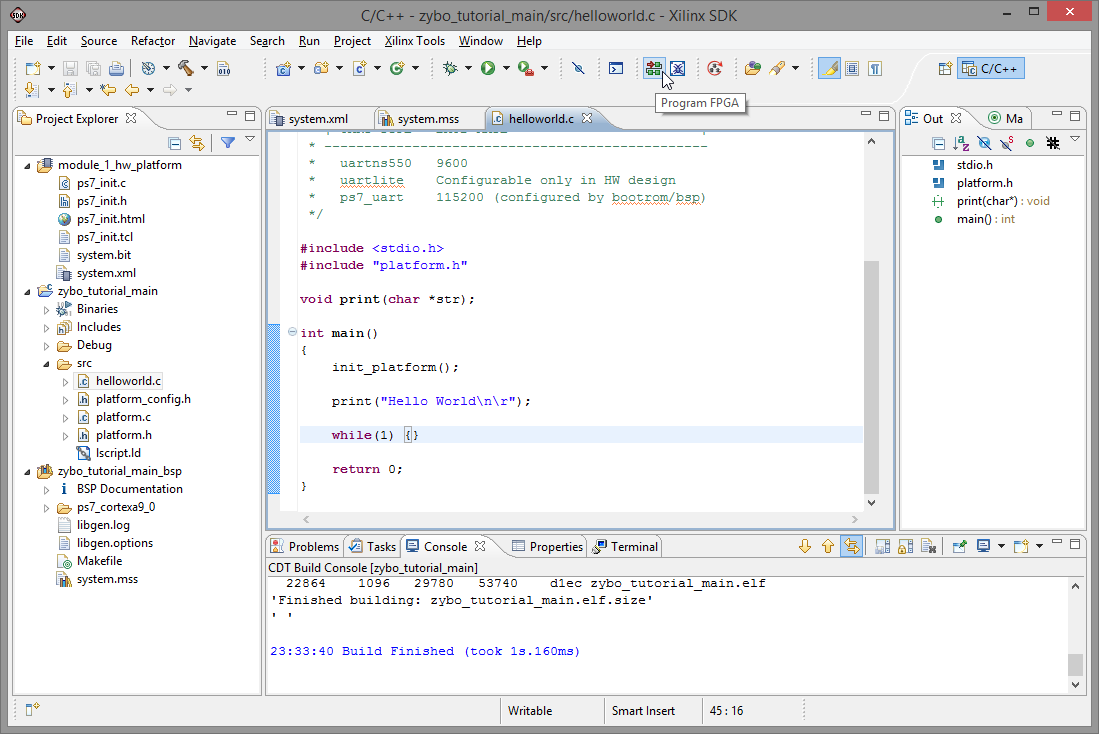
Before running the program, we need to program the FPGA with the bitfile. In the toolbar, click Program FPGA.
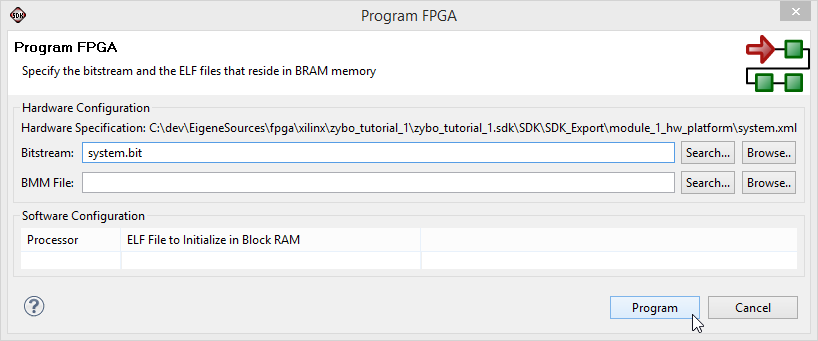
Make sure the exported Bitstream is selected. If the field is empty and the Search... box lists no bitstream file, you probably missed exporting it to the SDK. You may either repeat that step or use Browse... here to navigate to the bitstream file up the directory hierarchy.
With a bitstream file selected, click Program.
When doing this for the first time you will probably run into the error message Program FPGA failed due to the missing Xilinx Hardware Server.
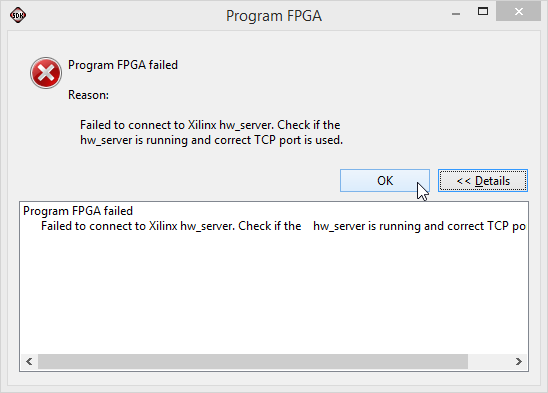
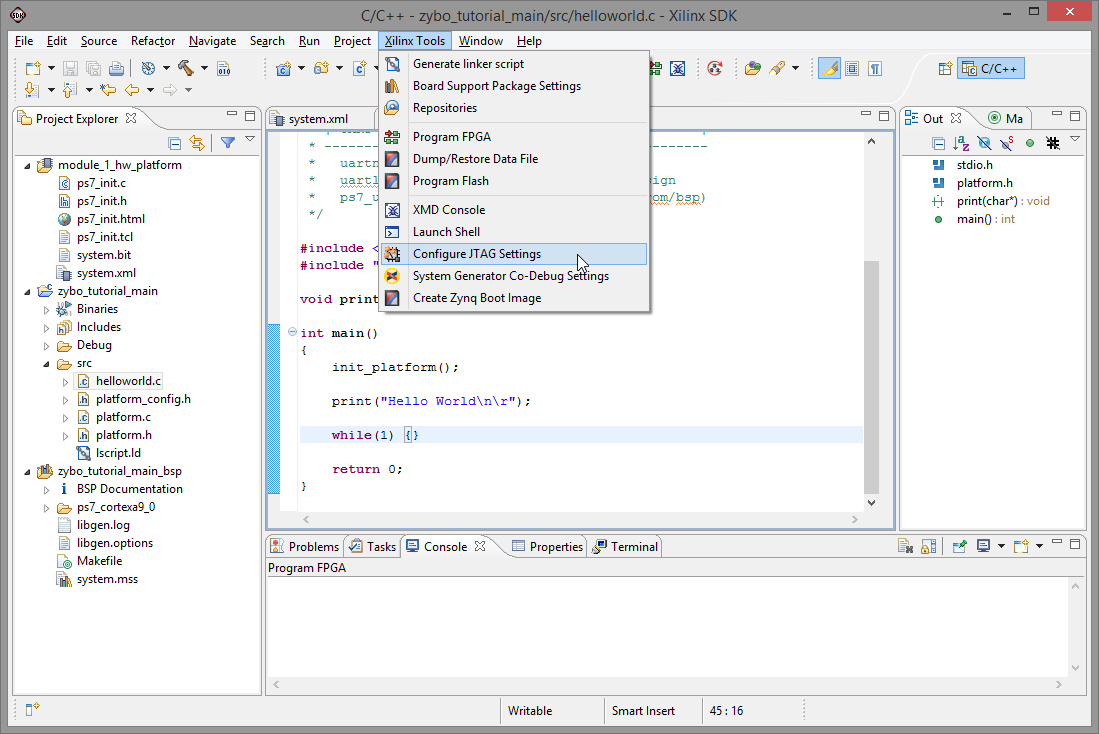
Since we do not use that — we have the Digilent plugins instead — we need to change the programmer cable settings using the Xilinx Tools, Configure JTAG Settings menu.
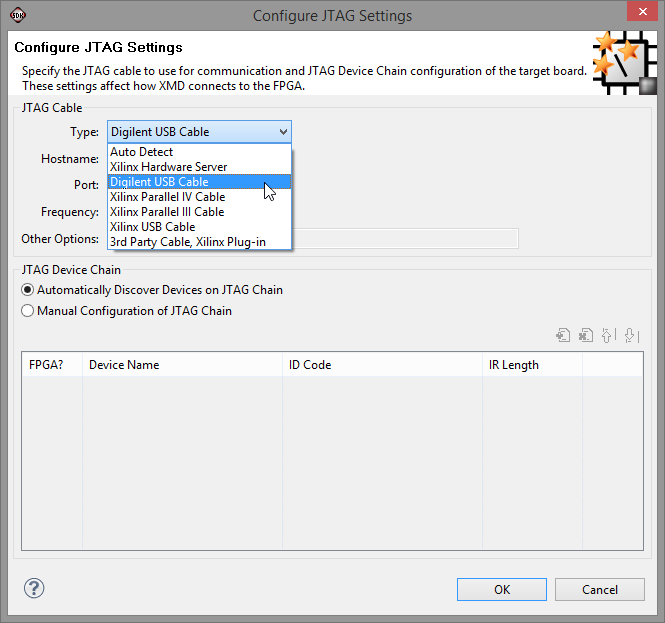
In the dialog, select the Digilent USB Cable and confirm the change, closing the dialog.
If that option does not appear, make sure you have the recent (double-check that!) Digilent Adept software and the Digilent Plugins for Xilinx Tools installed; You'll find them on the Digilent website. You may also need to restart Xilinx SDK after installing them — remember that you can always open it from the Export Hardware for SDK dialog in PlanAhead again.
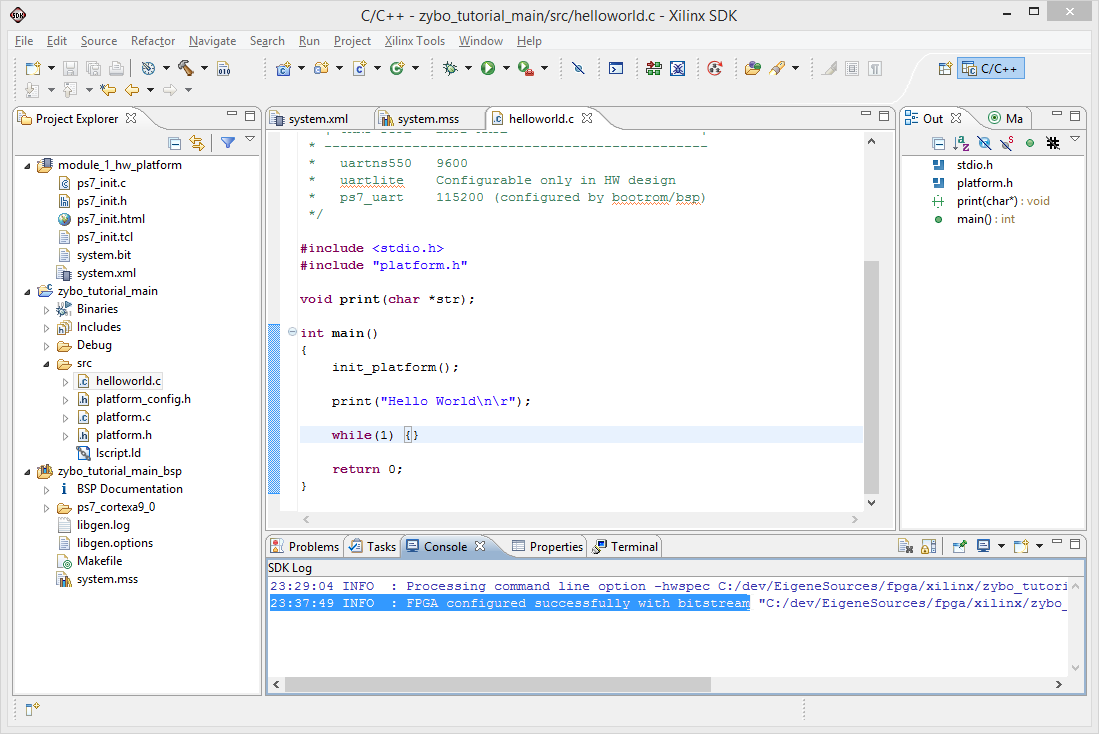
After that, flash again and wait for the message FPGA configured successfully with bitstream to appear in the console.
Run and debug the program
Next we will create a run configuration. Click the Debug icon's down arrow in the toolbar and select Debug As, Launch on Hardware (GDB). We cannot chose System Debugger instead, since we do not use the Xilinx tools.
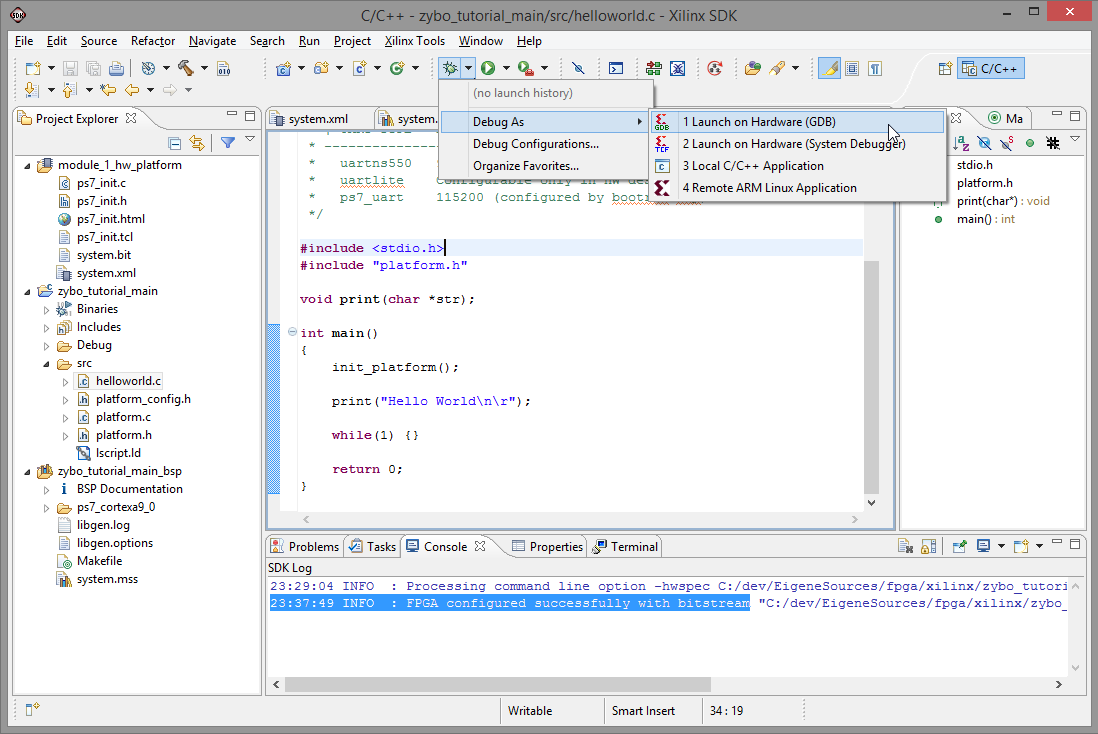
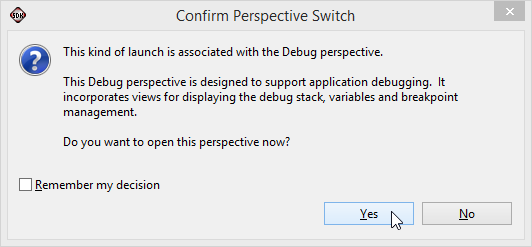
Confirm to switch the perspective, which is common Eclipse behavior.
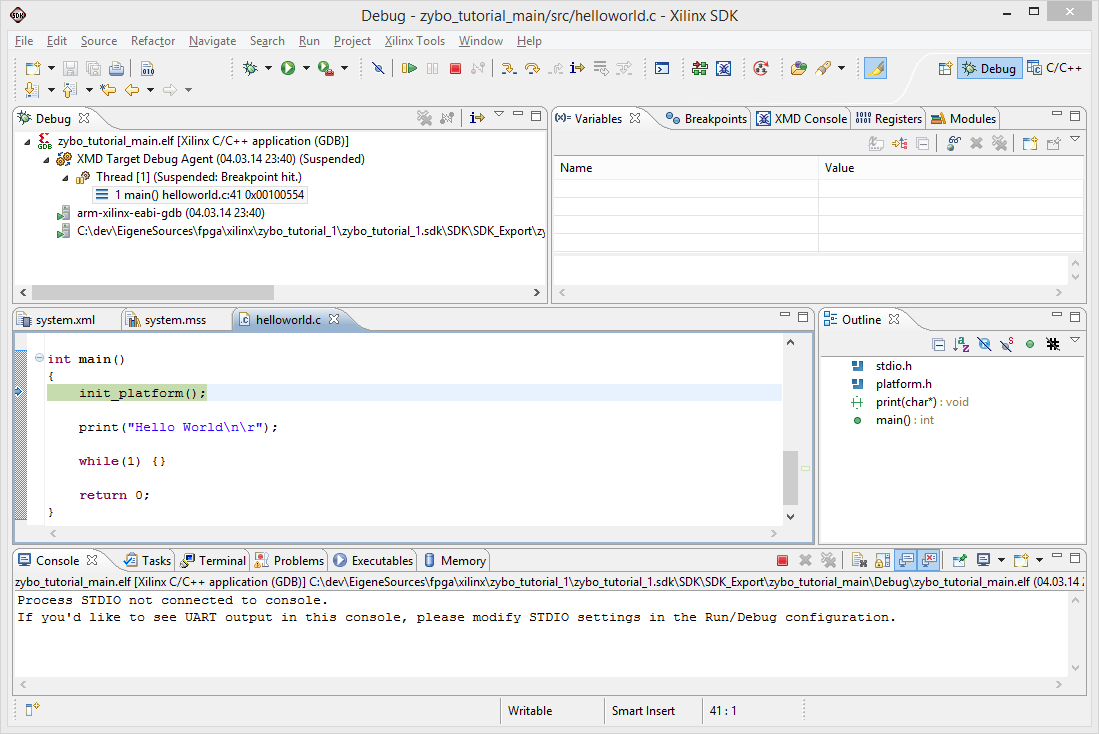
The program should launch and the execution will halt on the first line of main().
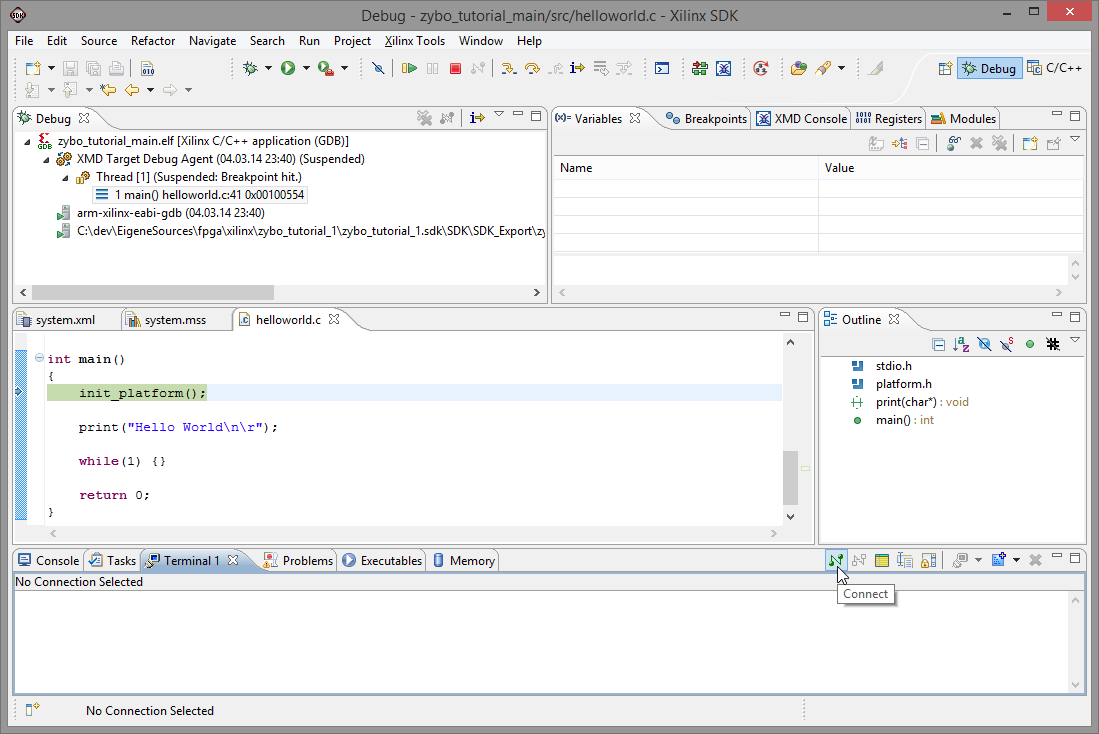
Switch to the Terminal 1 tab at the bottom and click the Connect icon to open the terminal settings dialog.
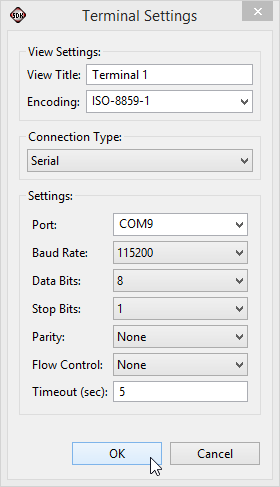
Select the board's connected COM port (check Windows' Device Manager to find it), set the Baud Rate to 115200 and click OK.
After doing so, step over the next lines using the Step Over command of the debugger. You should eventually see the serial output in the terminal window.
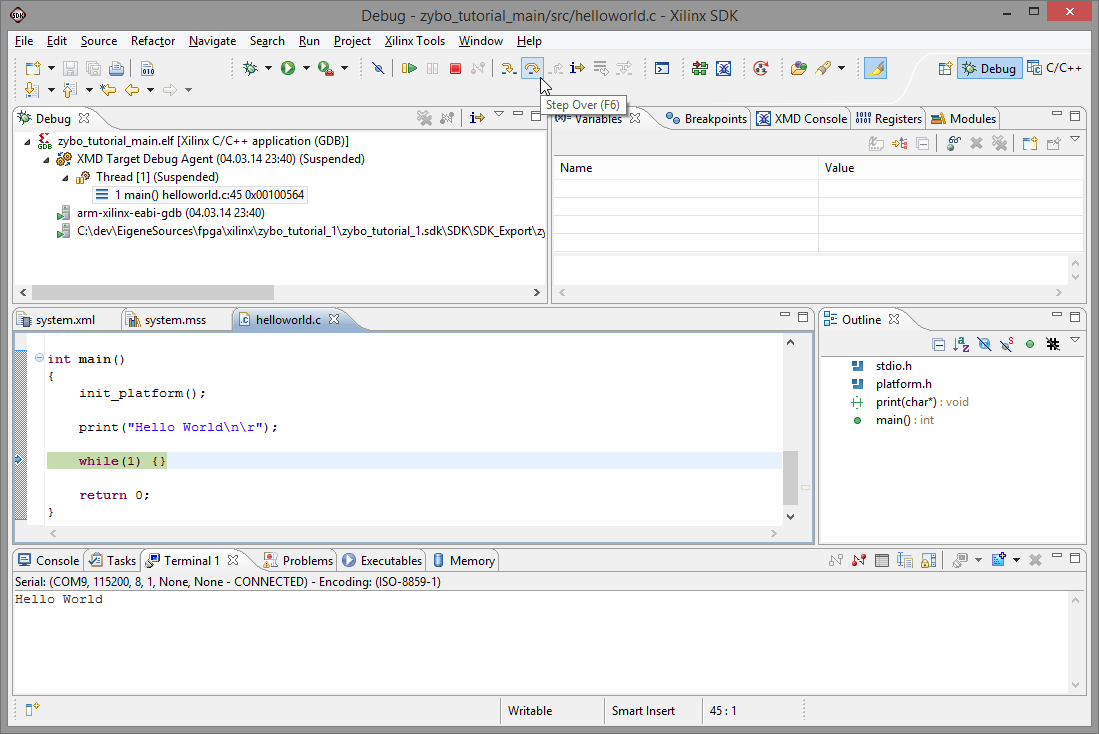
And there you are. Play around with the switches and buttons on the board to see if it works.
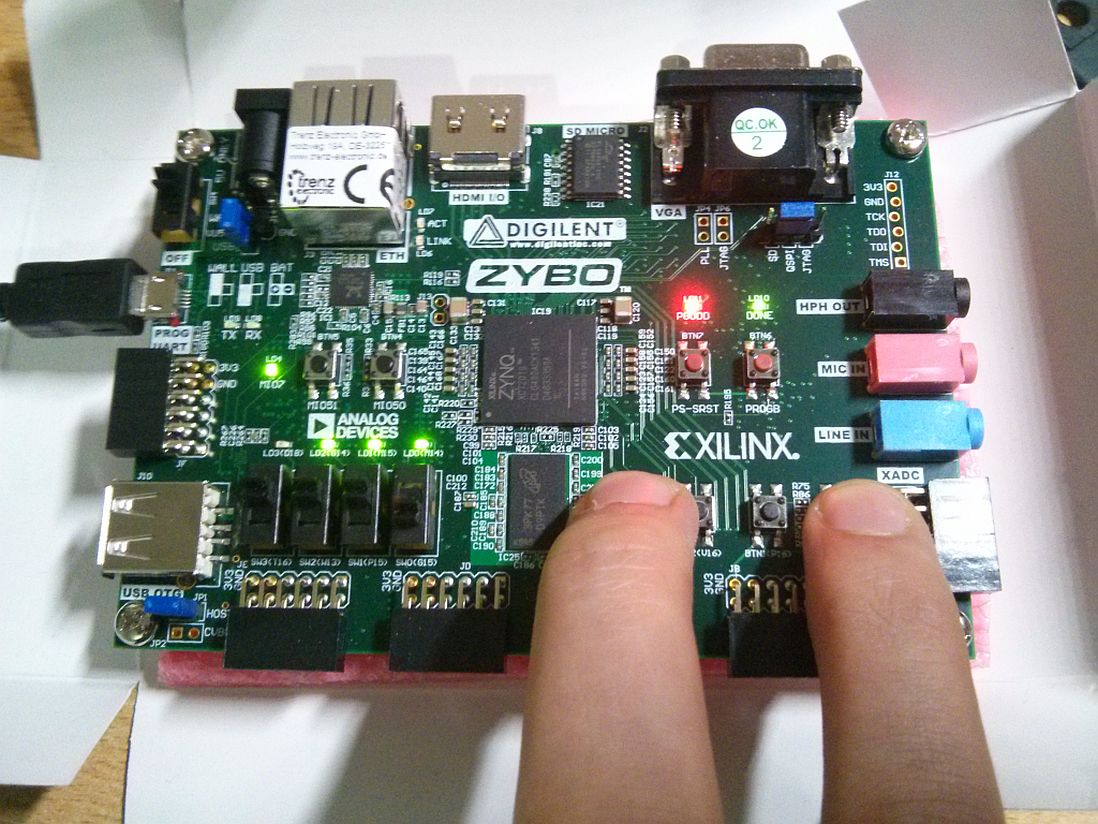
Having the switches and buttons xor'd, note how the leftmost LED is down, while the rightmost LED is high. Have fun!
Notes about resetting the system
At the moment all configuration is stored in a volatile manner. Resetting either the Processing System using the PS-SRST or the Programmable Logic using the PROGB button will revert any changes. If you have a vanilla ZYBO with the Terminal still attached, an output like the following may occur.
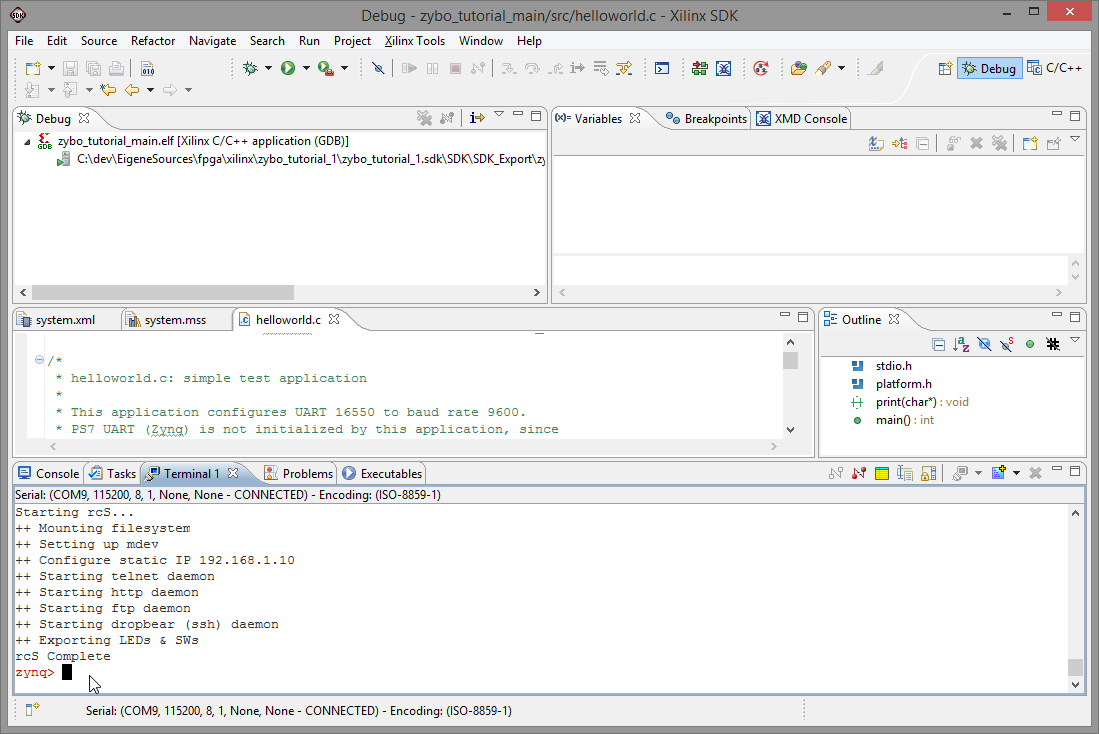
That's a different story though.
Have fun!
Parts of the tutorial
- Previous: Creating the Bitstream.
- Back to the start: Table of contents.